
Training Machine Guide
As a Nixcademy class participant, you get access to our training machine. It acts as a working fallback environment if you don't want to use a local installation of Nix and class-specific tooling during the training, or if your local installation stops working.
The training machine is configured so that you can experience Nix and NixOS integration tests the way they should perform.
The Howto Guides in this file:
Log In via SSH
The week before your Nixcademy class, the teacher should have asked for your favorite user name and public SSH key.
A few days before the class, you should be able to log in with the
following command (make sure to replace myuser with your
actual user name).
Please note that there are two hosts, select the one nearest to you:
eu.machine.nixcademy.com
for european usersus.machine.nixcademy.com
for north american users
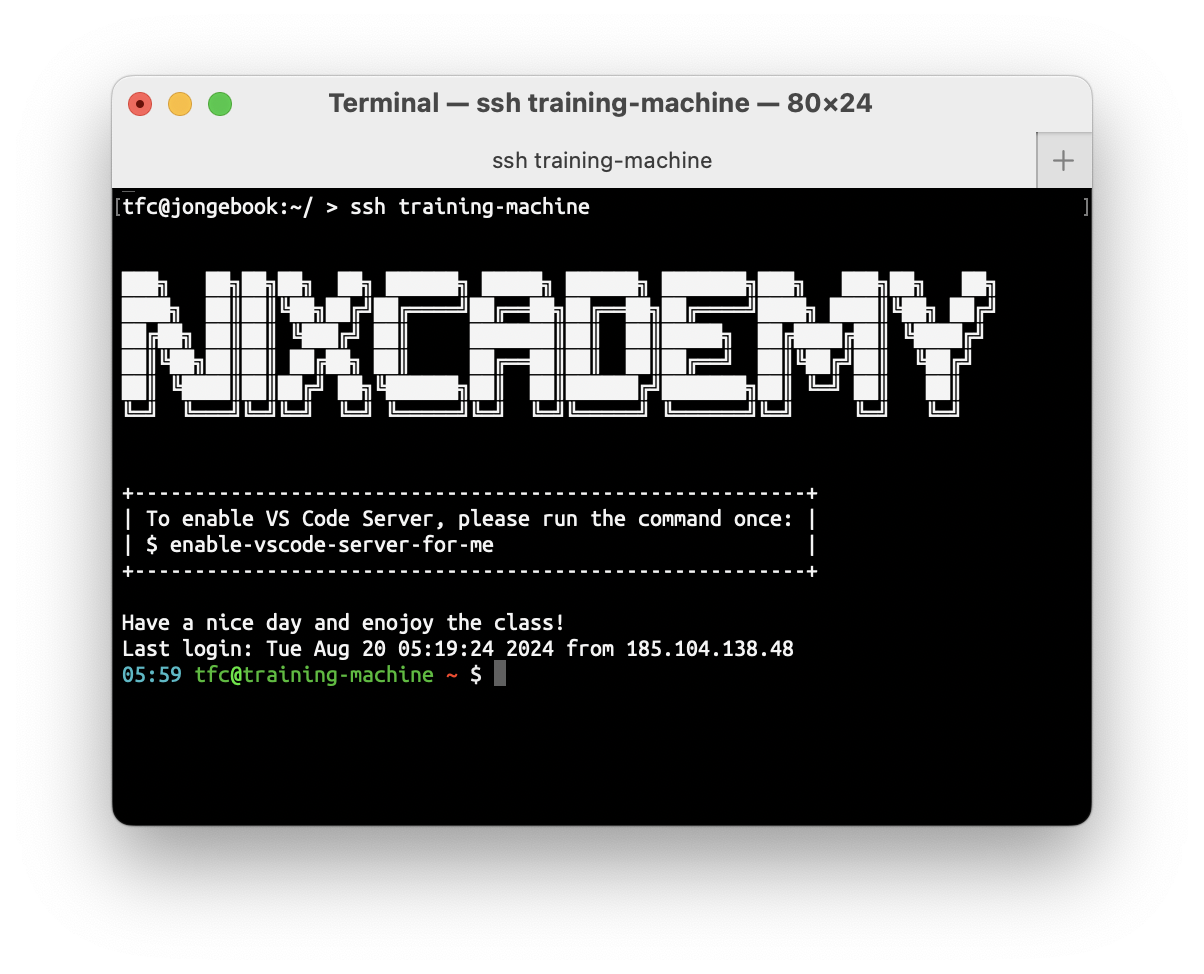
$ ssh myuser@eu.machine.nixcademy.com
The login should then look like this:
Connect Visual Studio Code
Visual Studio Code Remote Development allows you to use the NixOS training machine as a development environment from your local Visual Studio Code installation. To do this, follow these steps:
1. Login via SSH and prepare Visual Studio Code Server
Log into the training machine via SSH and run this command just once:
$ enable-vscode-server-for-me
2. Install Visual Studio Code Remote Extensions
Install the Remote Development Extension Pack.
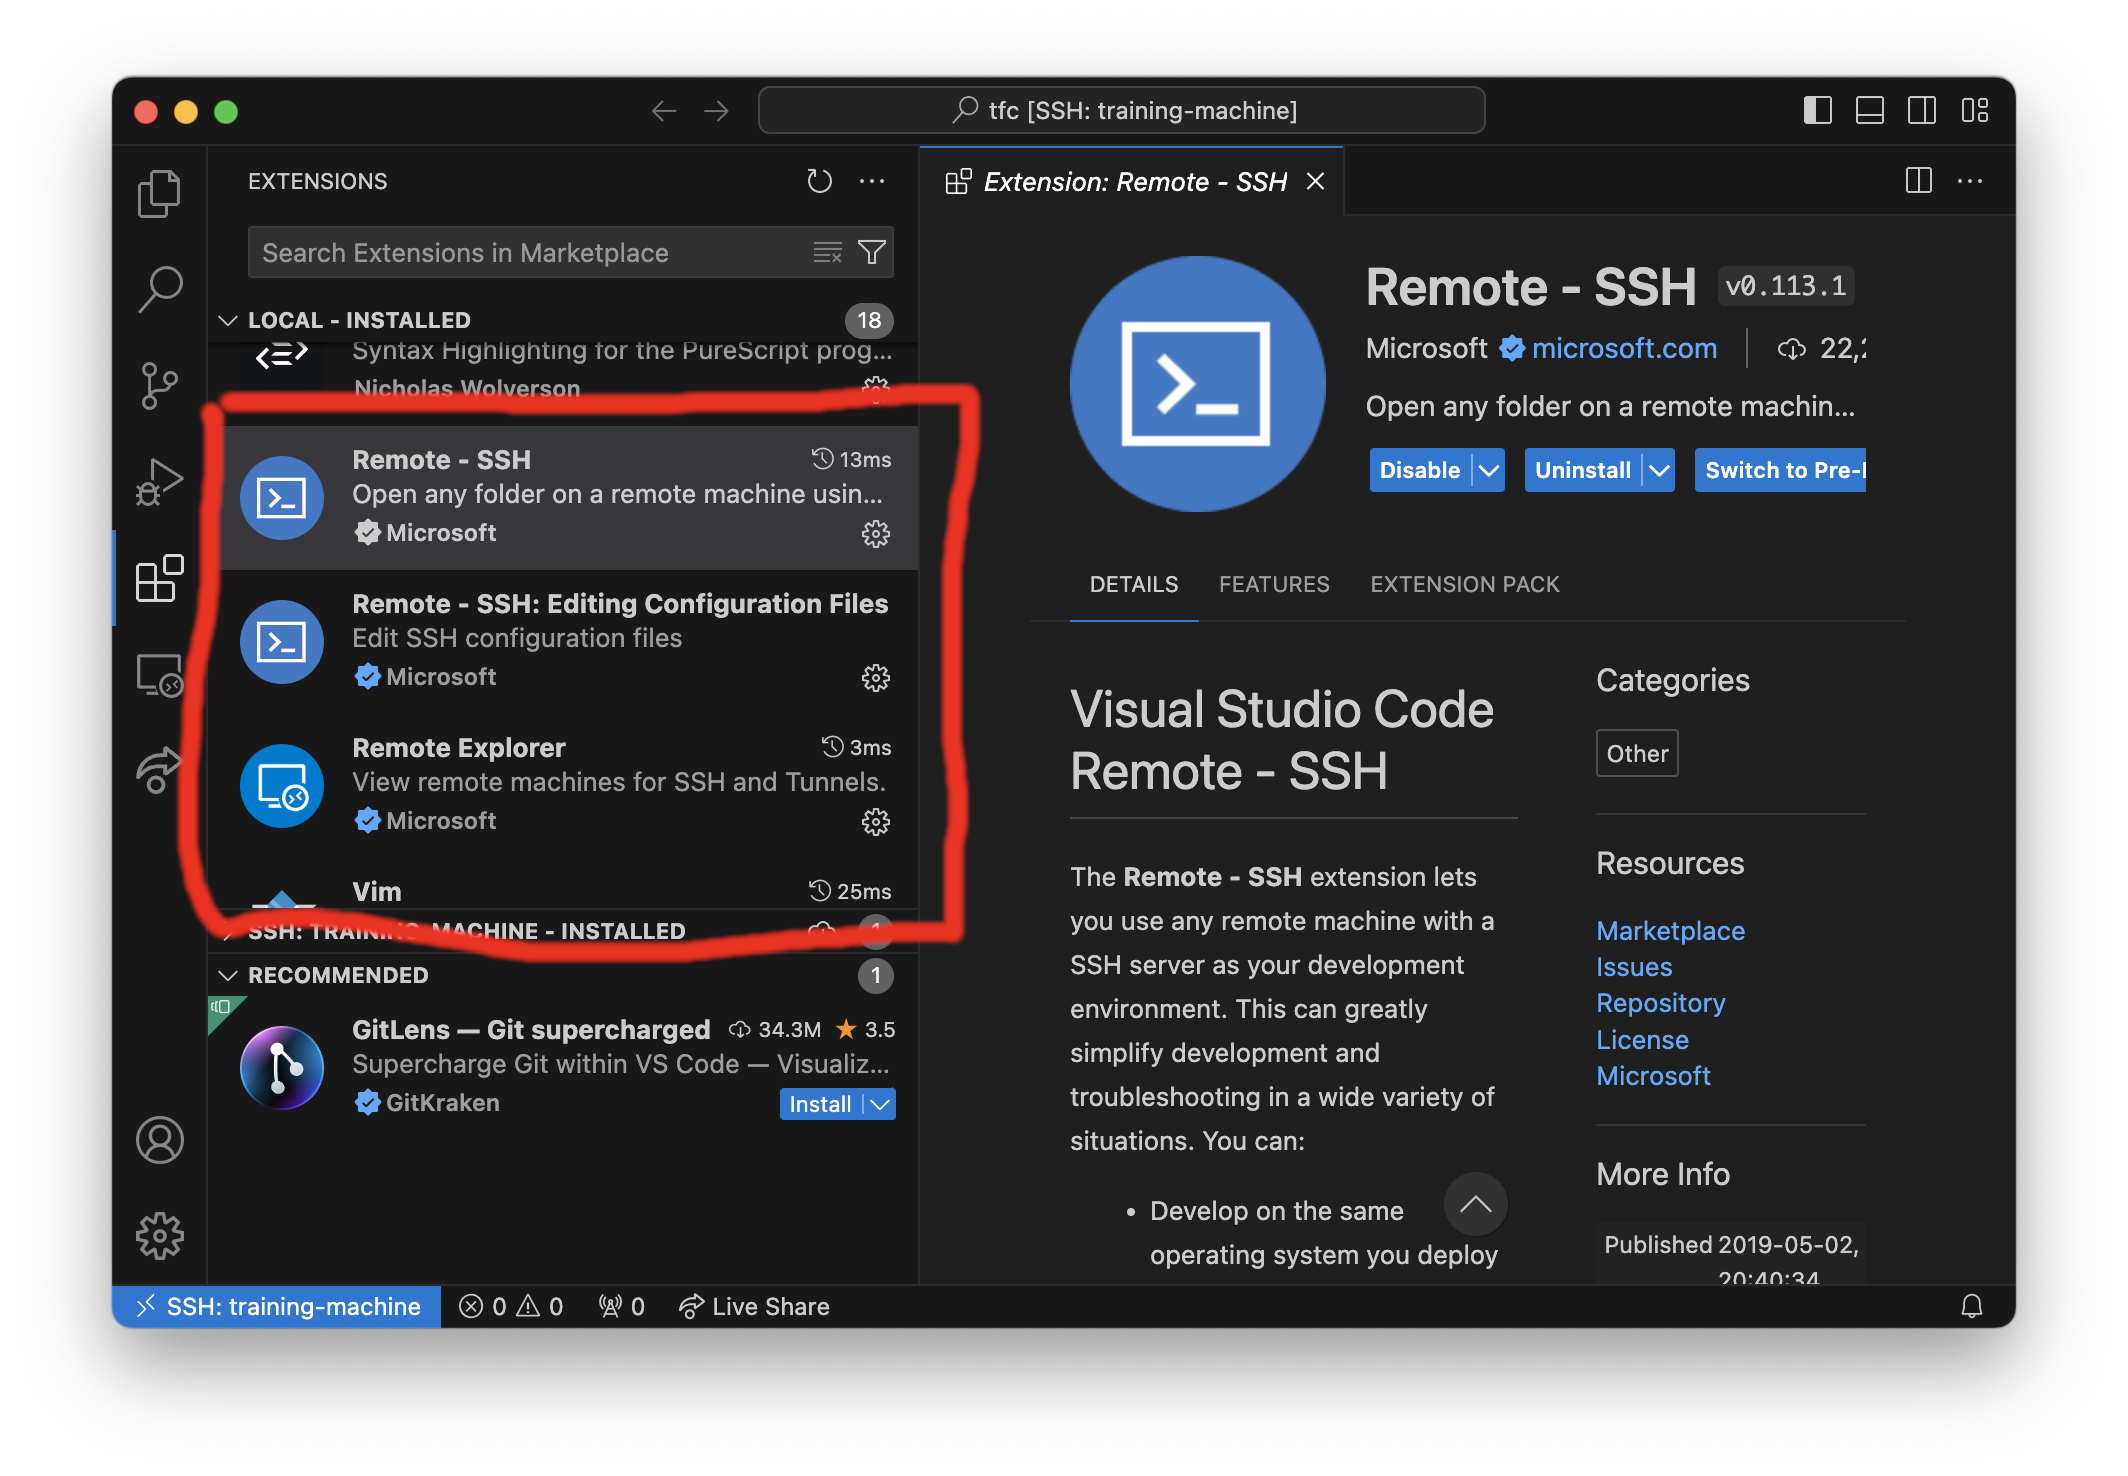
Please note that these extensions might not be available in VSCodium.
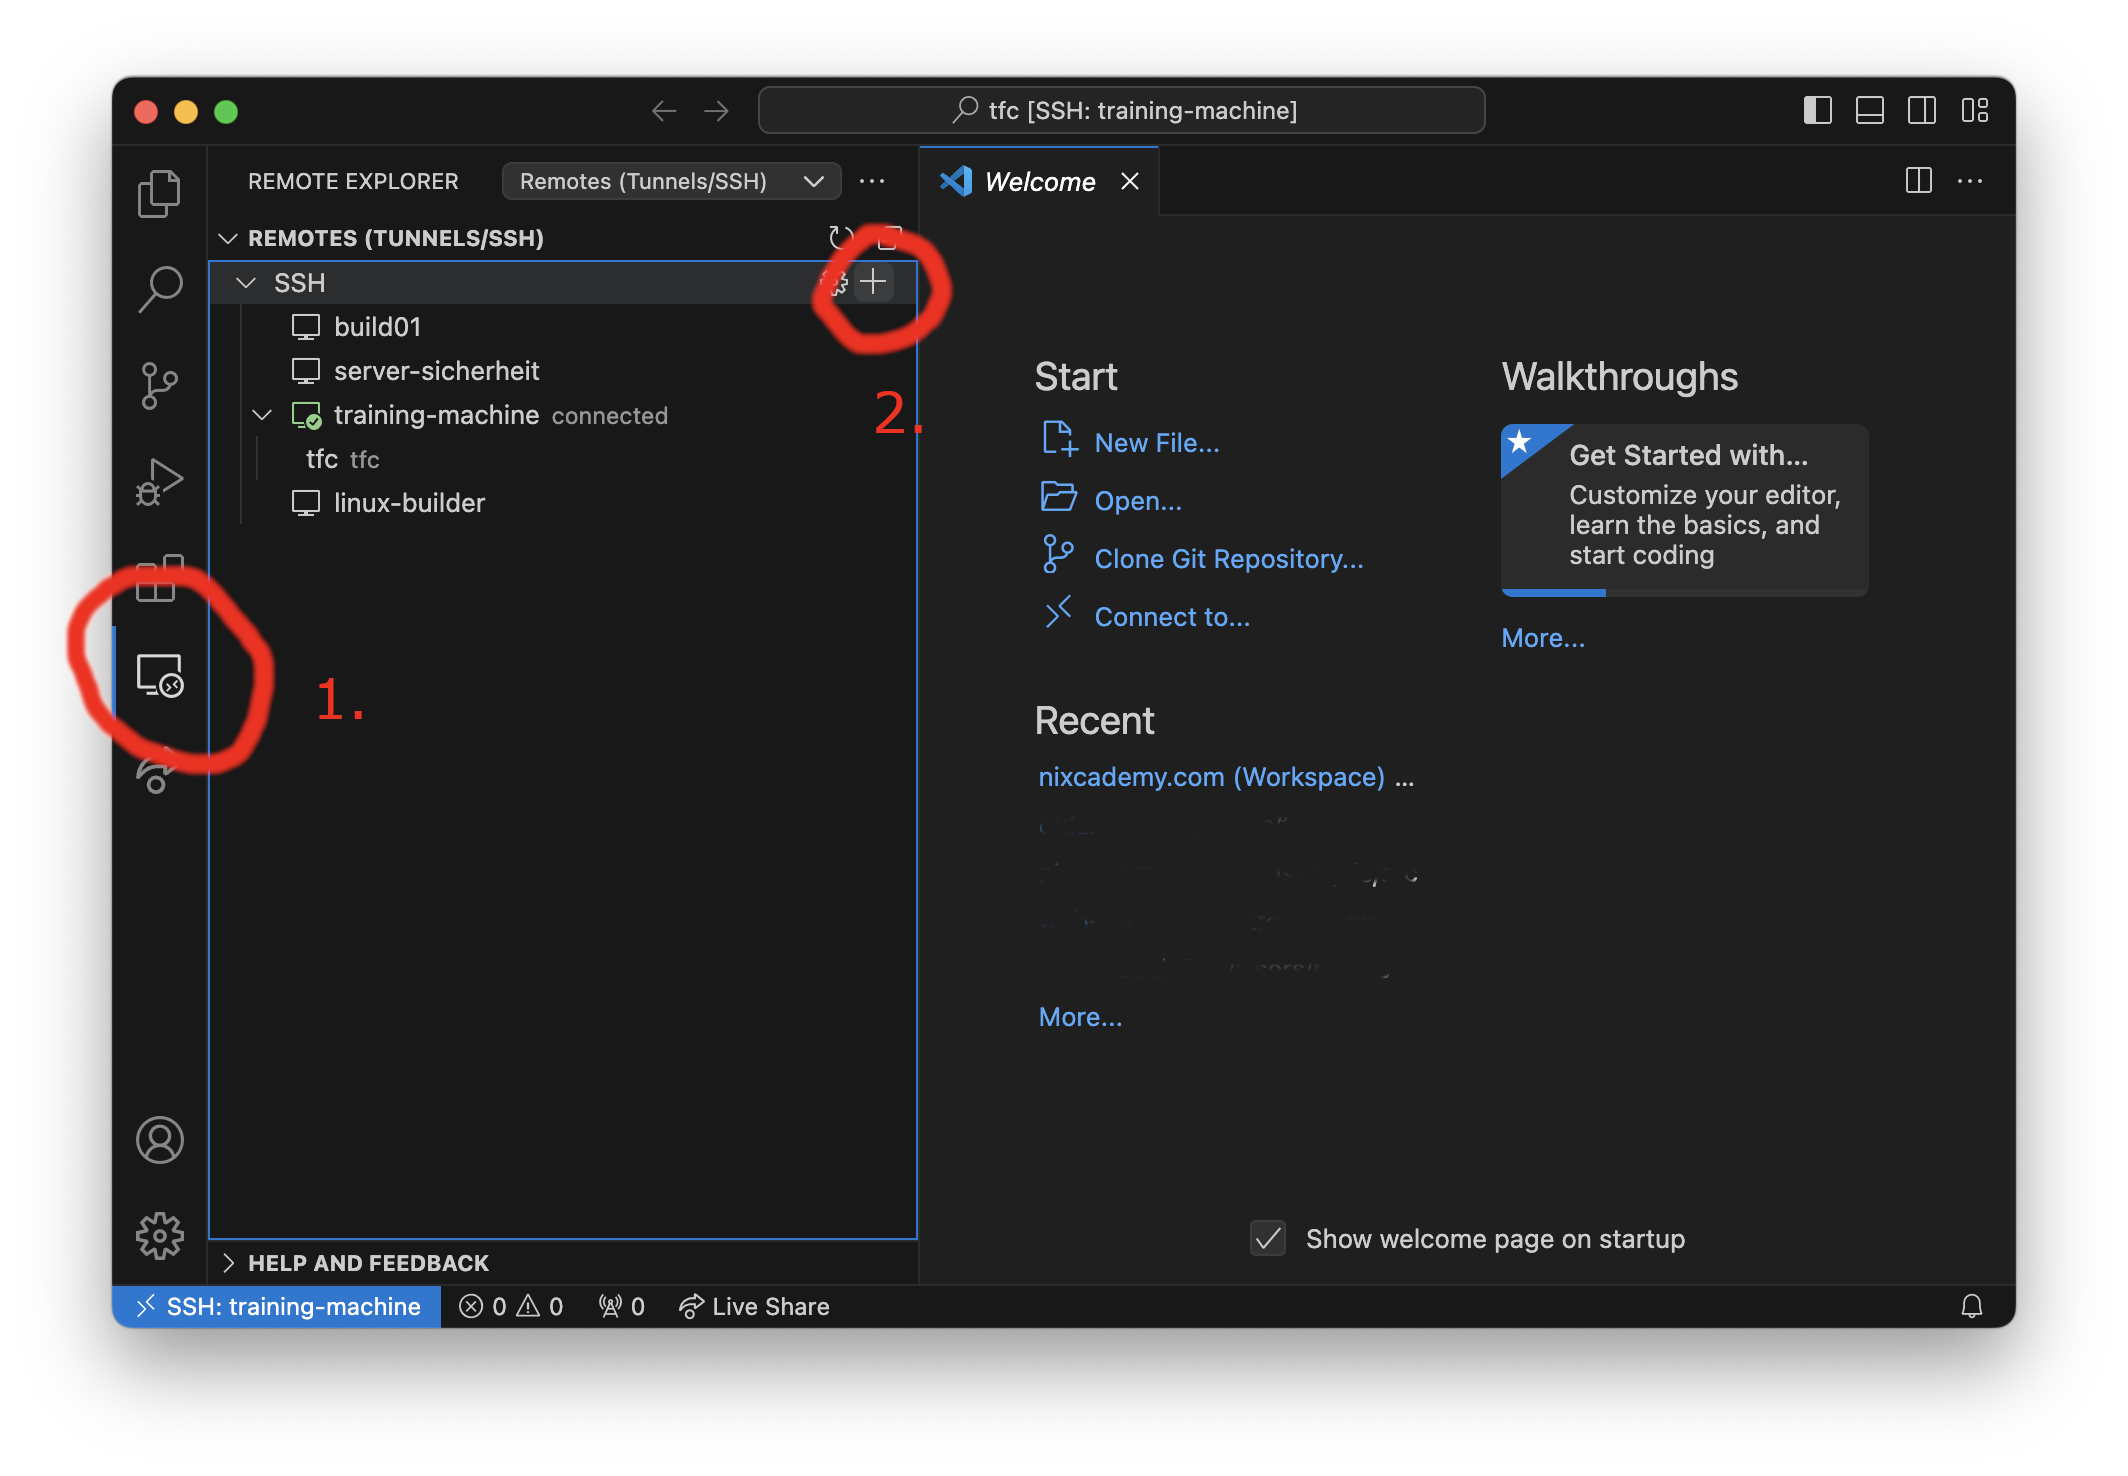
3. Add a New Connection
Add a new connection via the "+" button.
The username is your given username and the host name is training-machine.nixcademy.com.
4. Work
A working session looks like this:
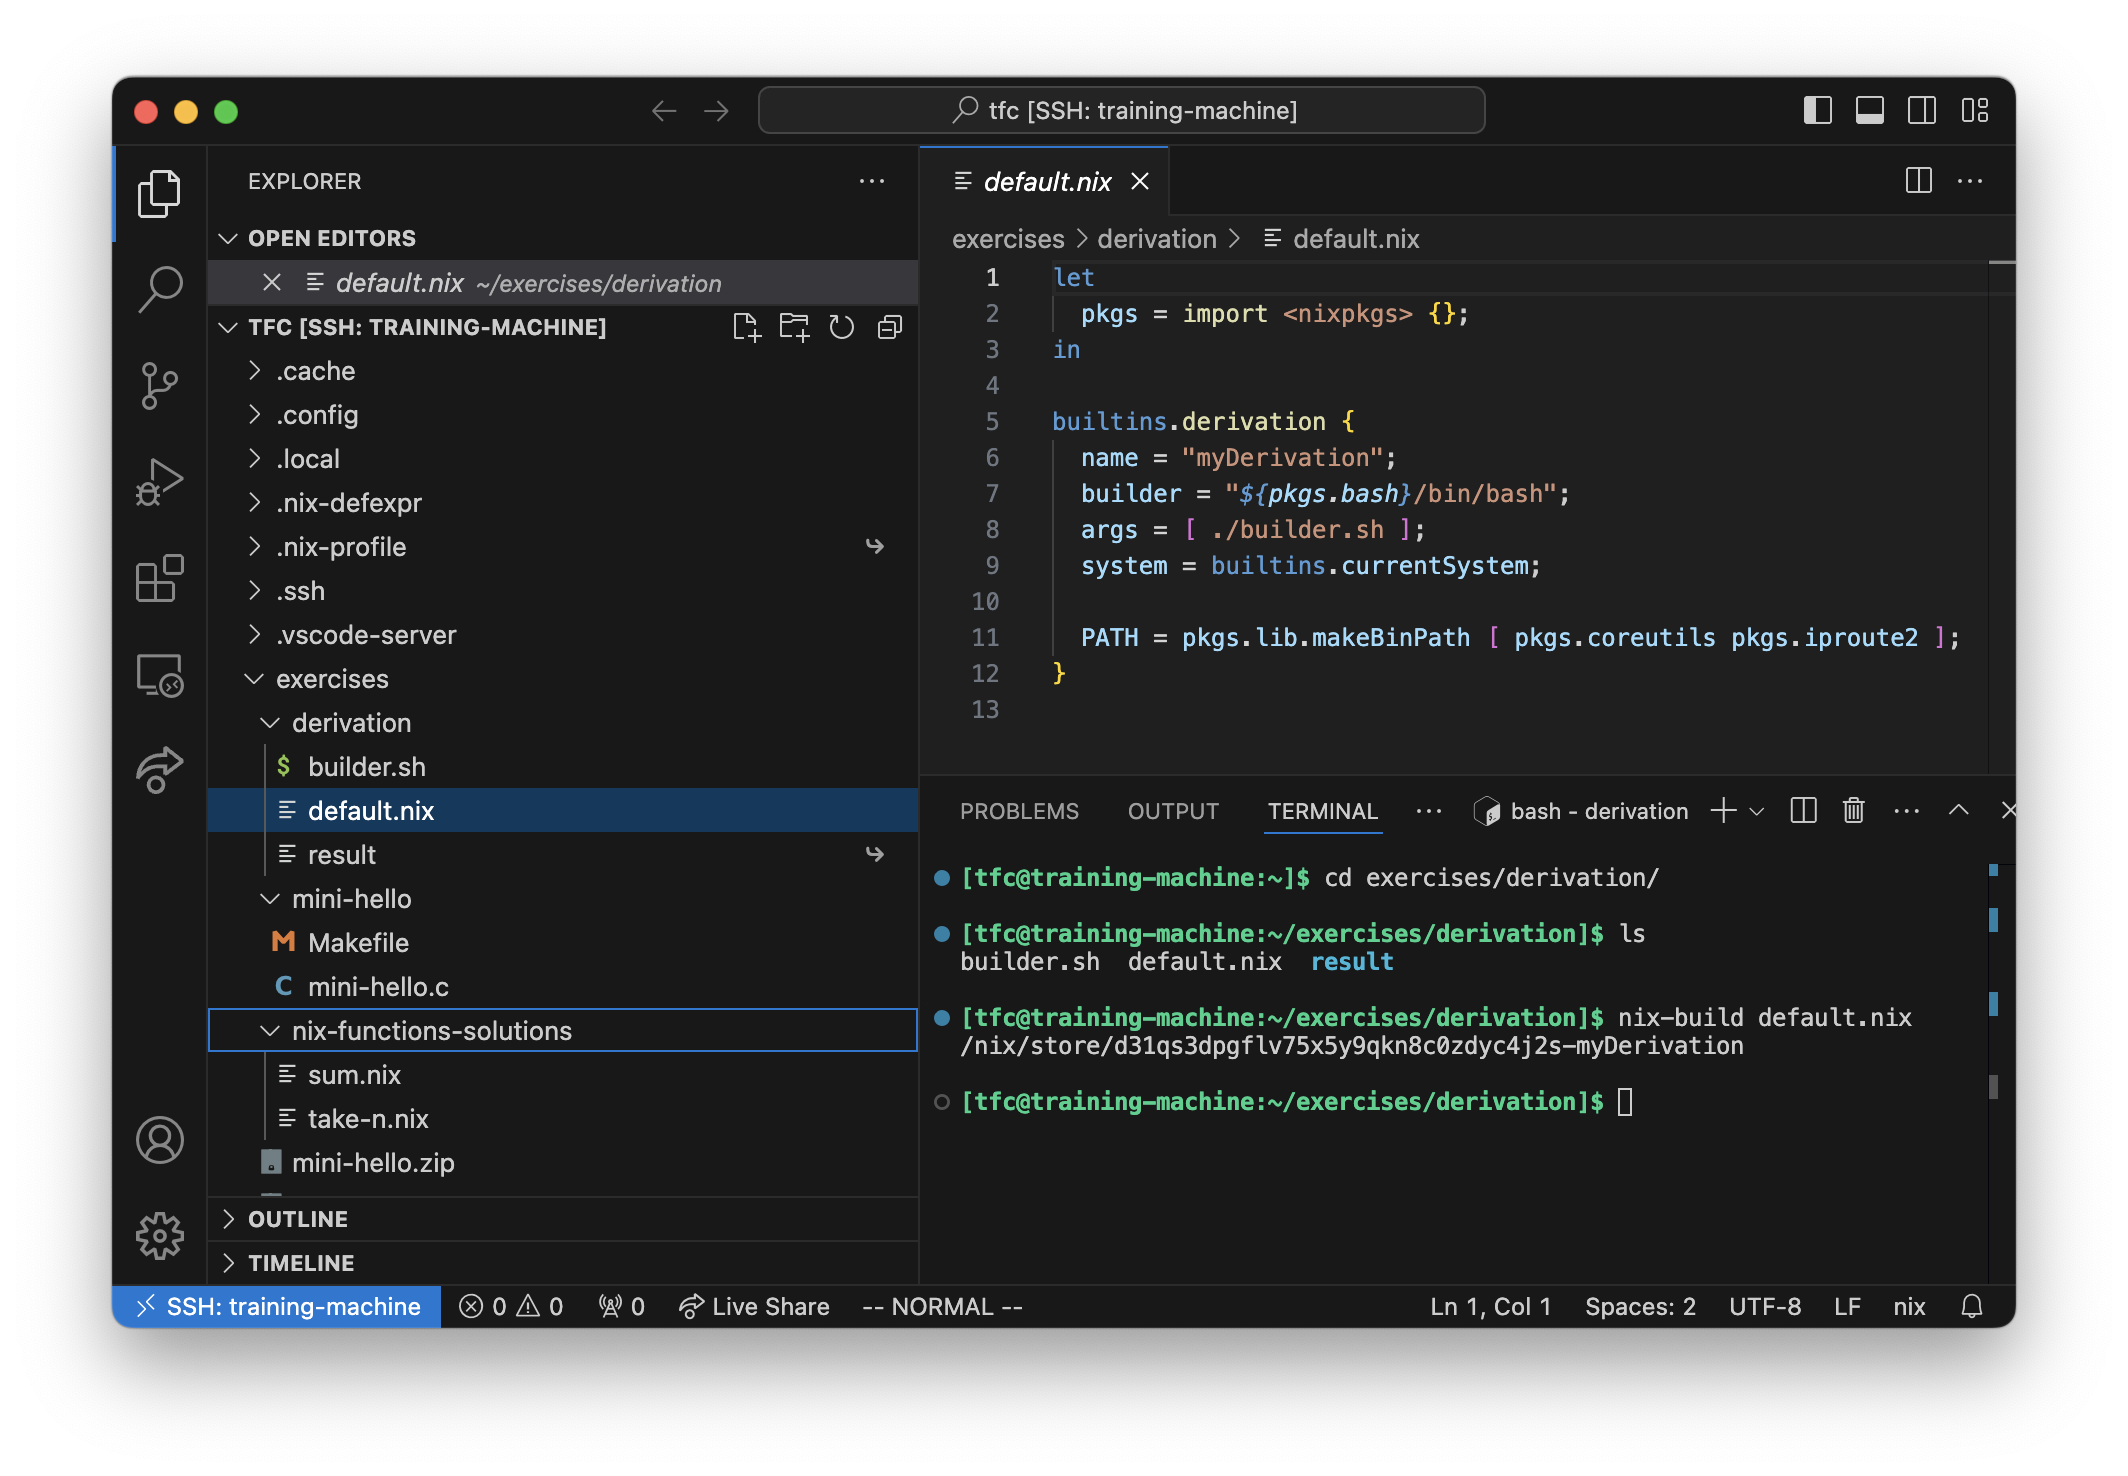
- On the left side, you see the home folder content on the remote machine.
- On the right side, you have your text editor and shells that
Install Your Favorite Tools
Several programs are preinstalled, but you can add your own:
# Permanently install emacs
$ nix profile install nixpkgs#emacs

# Run an only temporary shell with emacs
$ nix shell nixpkgs#emacs